
During an installation and partial upgrade of SCCM clients on my work we ran into som issues. About 200 clients was unable to be installed with the client push method. The log on the server didn’t get me any wiser so something else had to be done.
I came across Jason Sandys logon script and tested it out. Unfortunately the logon script was only ran on cable connections, due to slow network authentication on wireless adapters resulted in skipping the step.
Therefore i decided to use a Scheduled task instead.
This setup has been implemented on my own dev setup and has been implemented at my workplace with great outcome.
I recommend reading the documentation of Jasons script before implementing this setup.
What you need:
- Share with read acces for Domain Computers containing the client installation files.
- Share with full control for Domain Computers for error logging.
- GPO creating folders, and copying Jasons script to the client.
- GPO creating a scheduled task running the script in SYSTEM context.
Step 1 – Creating the shares
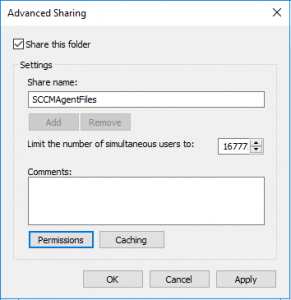
Make 2 shares on a server that are reachable for the clients.The first share are for the SCCM Agent Cleint setup files.Go to the Sharing pane and click on Advanced Sharing a give the folder a share name.
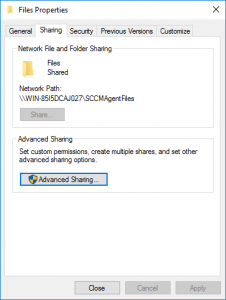
I choose to call mine SCCMAgentFiles.
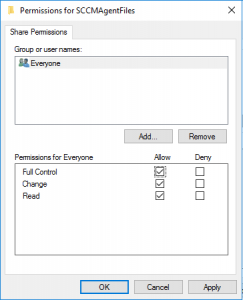
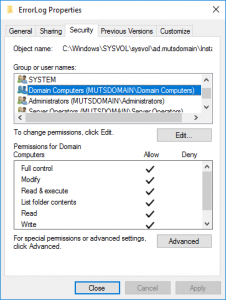
Give everyone full control on the share permissions as the security rights will overrule this. When it comes to share/security permissions, it’s always the most restrictive that wins.
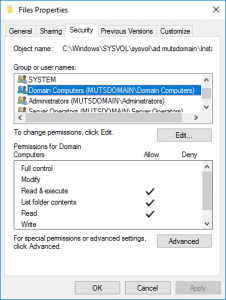
Make sure Authenticated users are removed from the security rights and that it’s only IT personal that have full control of the folder along with Domain Computers that have read access.
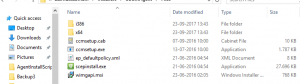
Move the client files to the folder:
The second share are for the Jason scipt error log, which is only used if something goes wrong in the installation on the client. Follow the same steps as the other share but give the Domain Computers Full Control instead of read, as the clients needs to write the log, and delete it if the installation succeeds on a later run. This share is called ErrorLog.
Step 2 – Configure the ConfigMgrStartup.xml file to your needs
Here is how i configured the XML. MinimumInterval and Delay has been configured with 0 as its managed by the scheduled task.
[code language="xml"]
<?xml version="1.0"?>
<Startup>
	<Option Name="SiteCode" >S01</Option>
	<Option Name="CacheSize">8120</Option>
	<Option Name="AgentVersion">5.00.8498.1711</Option>
	<Option Name="MinimumInterval">0</Option>
	<Option Name="ClientLocation">\\WIN-85I5DCAJ027\SCCMAgentFiles</Option>
	<Option Name="MaxLogFile">2048</Option>
	<Option Name="ErrorLocation">\\WIN-85I5DCAJ027\ErrorLog</Option>
	<Option Name="Delay">0</Option>
	<InstallProperty Name="SMSMP">SCCM2016.ad.mutsdomain</InstallProperty>
	<InstallProperty Name="SMSSLP">SCCM2016.ad.mutsdomain</InstallProperty>
	<CCMSetupParameter Name="BITSPriority">HIGH</CCMSetupParameter>
	<CCMSetupParameter Name="noservice" />
</Startup>

[/code]
Read Jasons documentation for further XML configuration options.
After the XML has been configured, copy the files to a share where all clients have access. I used the SYSVOL folder on the domain controller as this folder is already readable for the Authenticated Users.

Step 3 – Configuring the GPO(s)
Last step is to configure GPO(s) so that the folders and script files are copied to the client. I have chosen to configure it all in one GPO that’s linked to all workstations.
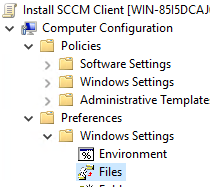
First go to the folder policies for the Computer Configuration.

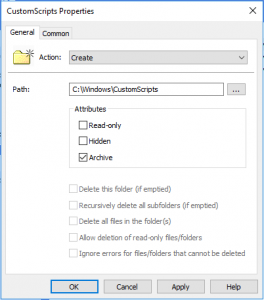
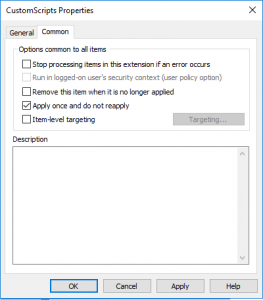
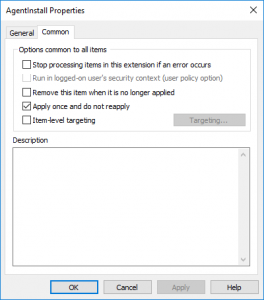
Make the folder structure in the right order. I have used the C:\Windows\CustomScripts\SCCM\AgentInstall folder for the scripts. And to only apply once.

Go to the files section.
Make an entry that copy all the files from the share to the folder you created.
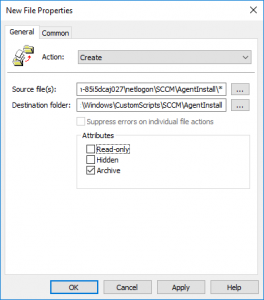 Source file(s):\\Win-85i5dcaj027\netlogon\SCCM\AgentInstall\*
Destination folder:C:\Windows\CustomScripts\SCCM\AgentInstall
Also here i only apply it once.
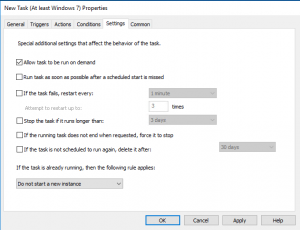
Configure the scheduled task.
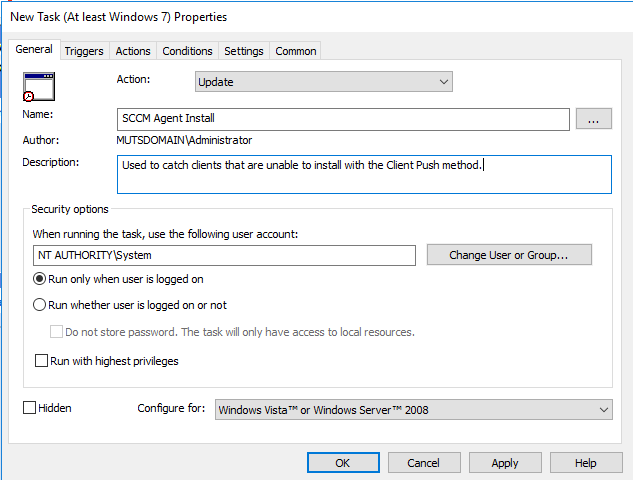
Create a new Scheduled task(At least Windows 7) with the following configuration. Make it run as SYSTEM and set it to update as that will update settings if you make changes on a later time.
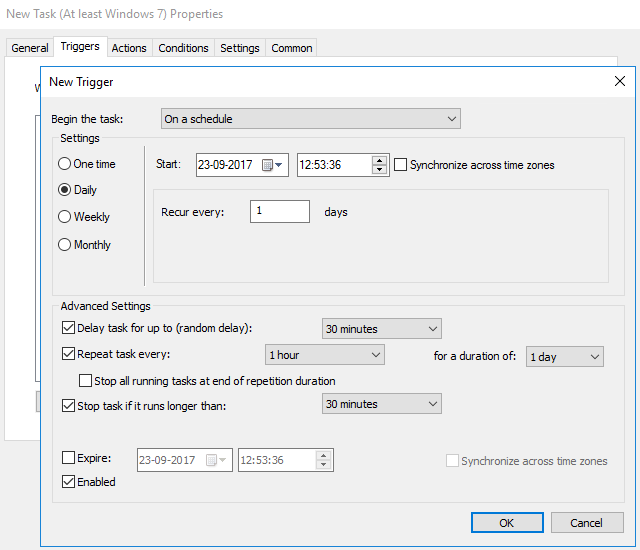
Configure the triggers. I choose to make the script run once every hour as it’s very simple and has no performance impact what so ever.
Make the action. The action is the script execution and here it’s very important that you use the full path in the parameter, otherwise the script will not be able to locate the XML file.
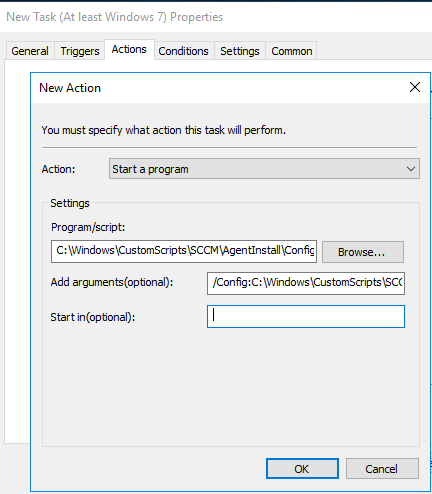
Script: C:\Windows\CustomScripts\SCCM\AgentInstall\ConfigMgrStartup1.75.vbs
Arguments:/Config:C:\Windows\CustomScripts\SCCM\AgentInstall\ConfigMgrStartup.xml
Set the schedule to only run if there is a network connection available. If the script runs and the client can’t access the shares, the script will then exit.
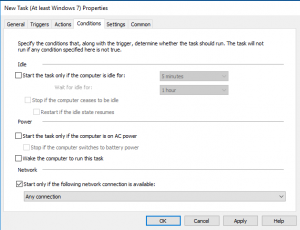
In the settings pane, make sure that the schedule can be startet on demand and dual instances is not possible.
That’s it! Do a gpupdate on the client and see if the folders/files are created and that the scheduled task is created and set to run within an hour.
We managed to migrate/install 180 clients with a 96% success rate with this setup.
Feel free to leave a comment!