I did some work for a customer where application deployment had been serviced by many different technicians. All technicaians had their own approach of deploying the applications, and therefore the naming of apps, collections, task sequences and folders was all messed up. During my cleanup i realized that the easiest way to ensure that someone else would not mess it up again, was to make a scripted/automated solution. Because of the workload on the customer i decided to do it in my spare time, and therefore i made it adaptable for every SCCM enviroment, and free for everyone to use!
For now it only works with PowerShell App Deploy Toolkit applications, but with some changes it could handle simple MSI applications as well.
How it works
The setup will consist of 2 scheduled task on your SCCM server and create applications from what you upload using the Application Uploader. I did this to make its possible to upload from any test machine – no module on the client needed.
What will the script do for you?
- Create applications with a defined naming standard, with icon and detection method.
- Create deployment method.
- Create deployments.
- Create collections,
- Create security groups for each collection.
- Create a application for technicians to easy upload new applications to the server and trigger the creation.
Prerequisites:
- RSAT tools on the SCCM server.
- An service account granted at least ‘Application Author’and ‘Application Administrator’ rights in SCCM.
- OU for the security groups refereeing to the collections, where the service account have modify rights.
- Share for the source files to be uploaded by the Application Uploader, where the service account and technicians have modify rights.
NOTE: It’s recommended that you create a security group that you assign rights to both the OU and the share. You can later add technicians to that group as they need access to the share as well.
Installing the tool:
- Extract the zip file into a folder on the SCCM server.
- Run the ‘Install.bat’. (the bat file will just ensure that you start the installer script as admin)
- Before you are able to install, the installer will check if all the requirements are meet.
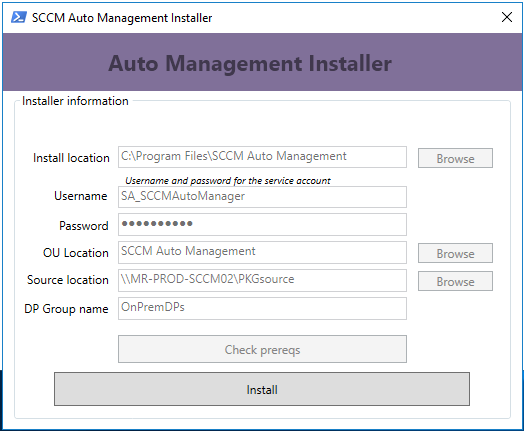
Hit Install!
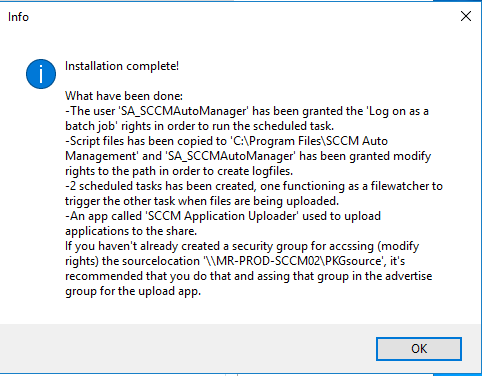
4. After the installation it will show what has been done:
Using the tool:
After the installation the the ‘Application Uploader’ tool is being created.
Add the security group – that you granted acces to the source share – to the ‘ava-ins-usr’ sec group in the OU. Wait for the AD sync job to run in SCCM and update the collection (standard every 5 minute as default).
When the user is present on the collection, do a update policy on the client.
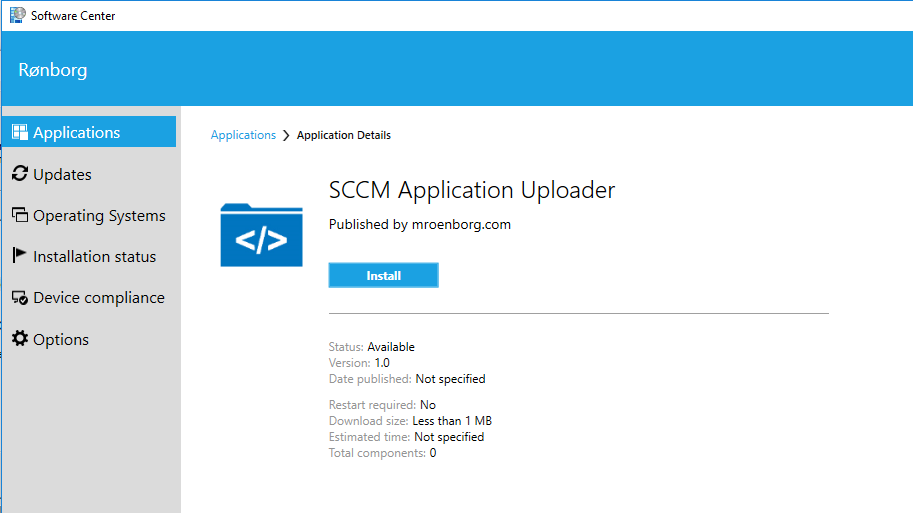
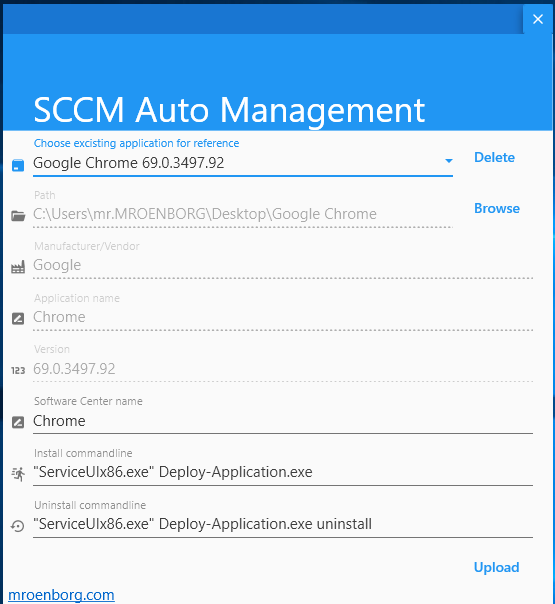
Use the application to upload PSADT packages (by placing a .icon file with maximum 250×250 pixels in the root folder of the uploaded app, the icon will be assigned to the application automatically):
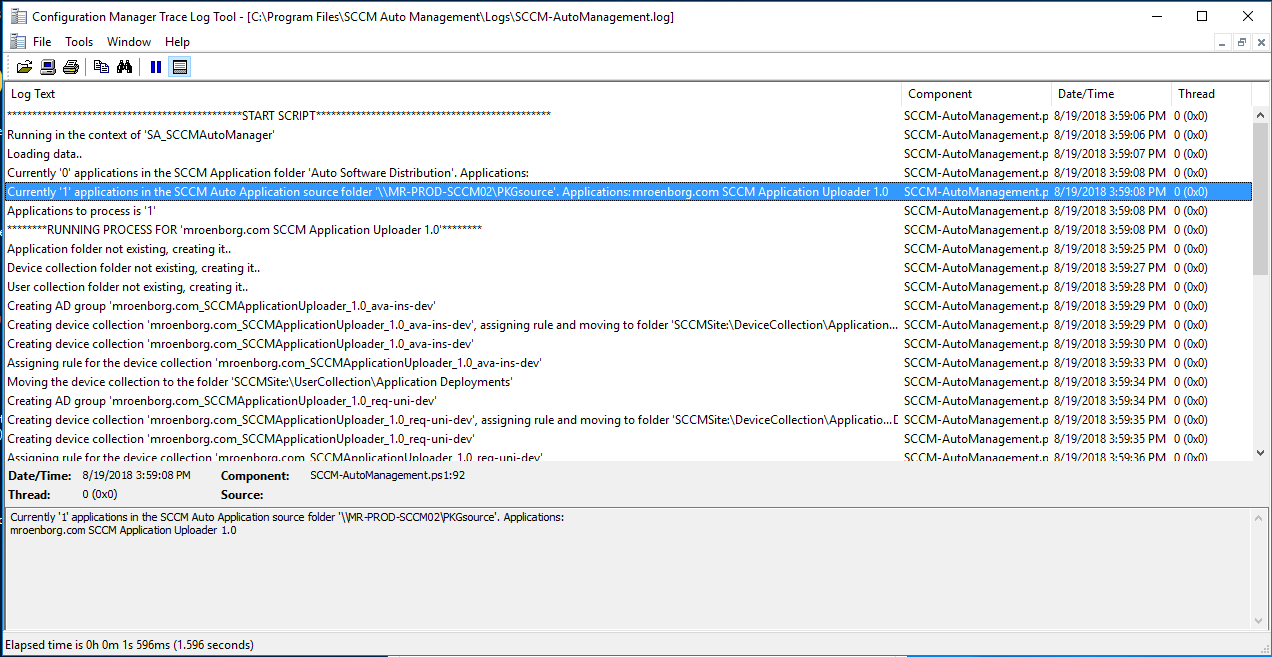
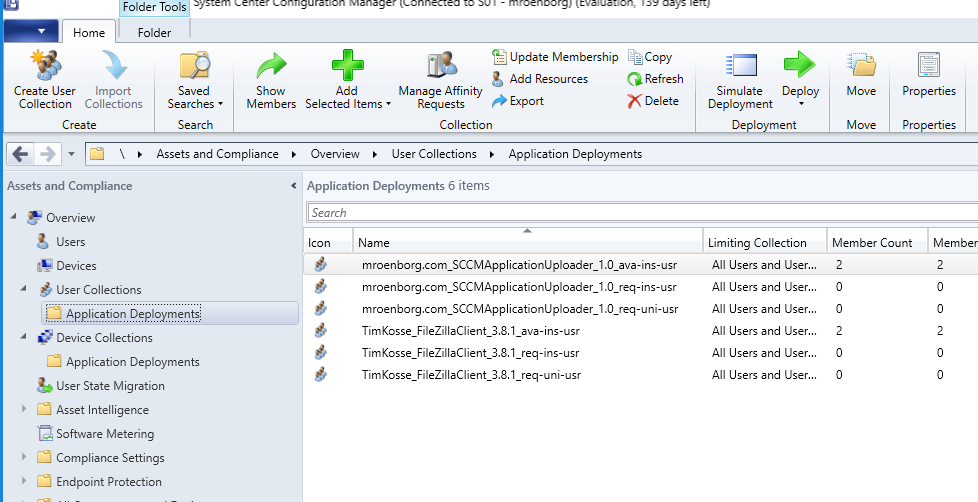
You can follow the creation status on the server.

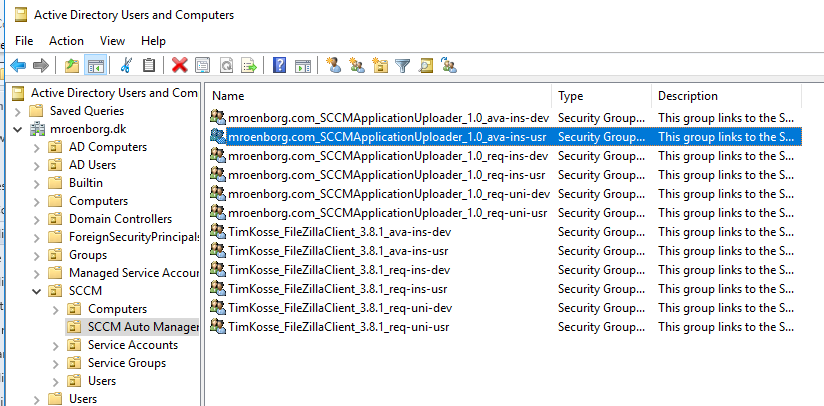
When done you can control your deployment with the collections or security groups as desired:
To uninstall
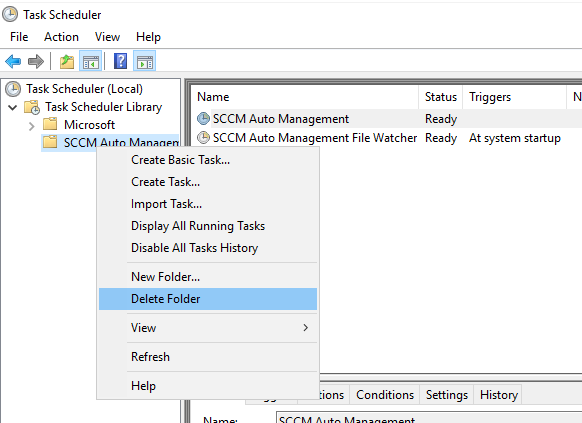
1. Remove the scheduled tasks:
2.Remove the folder containing the scripts in your install location (default is “C:\Program Files\SCCM Auto Management”).
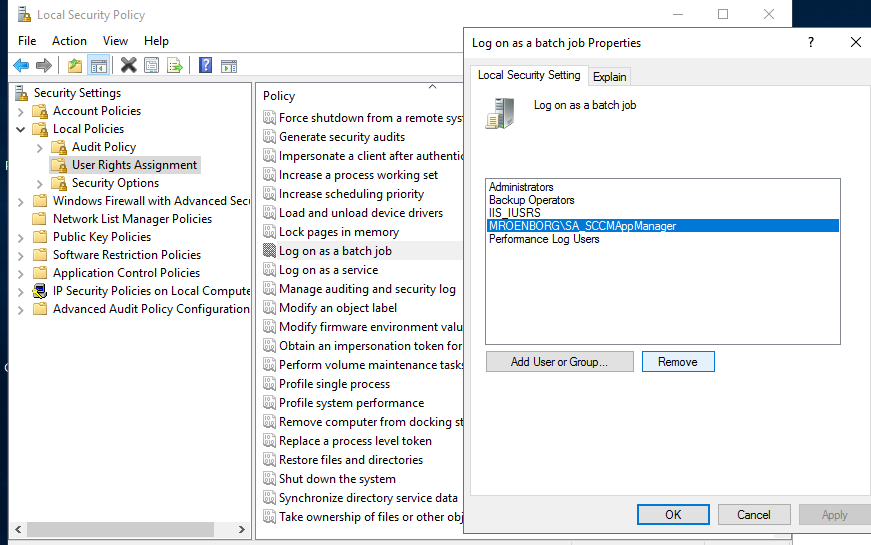
3.Remove the service account from the log on as a batch job users:
Optinal: remove the rights from the shared folder and OU containing the security groups.
To upgrade/reinstall
Take the new version and run the script installer, it will re-create scheduled tasks, copy files etc.
Version history:
Version 1.21:
-Fixed a bug where the application uploader was not created after installation.
Version 1.2:
-Completely new UI in the uploader.
-Option to delete.